Deploying A Private Post-merge Ethereum Testnet
This article is a companion to the deployment configuration published on github.com/PierreBesson/private-ethereum-testnet.
Introduction
Running a private, fully-featured, post-merge Ethereum network can be quite complex, as it requires synchronizing at least three components:
- An Execution layer node, eg. client: geth; reth
- A Consensus layer beacon node, eg. clients: lighthouse, prysm
- A Consensus layer validator node, eg. clients: lighthouse, prysm
The complexity is exacerbated by the fact that each client has its own configuration format. For example, some use a genesis.json, other a genesis.ssz, keys are set up in different formats, etc.
Furthermore, you’ll need to have at least 64 validator keys properly set on your validator nodes and properly included in your genesis configuration.
Fortunately, the Ethereum Foundation DevOps team has created the Kurtosis ethereum-package to simplify the creation of development networks using any of the existing clients (such as Geth, Reth, Lighthouse, Prysm, Besu, etc.). This is achieved through extensive scripting in Starlark (Python) to generate the appropriate configuration for each client and deploy it via Docker or Kubernetes. More details on using Kurtosis to deploy local Ethereum devnets can be found in this EthPandaOps blog post.
However, the main limitation of this tool is that it is not suitable for long-running and persistent networks as the setup relies on scripts and tricks (eg. copying the appropriate files inside the node containers). It does not produce the declarative and reusable Kubernetes configuration that would be required for setting up a persistent and maintainable testnet.
To deploy our testnet, we propose the following approach:
- Run the devnet using Kurtosis to validate our setup, this can be customized with our own mnemonics and genesis settings.
- Extract the configuration files and keys from the working devnet.
- Load this devnet configurations in the target cluster using configmaps, secrets and persistent volumes.
- Create a proper Kubernetes testnet deployment using each Ethereum client’s Helm chart.
Running an Ethereum devnet in Kubernetes using Kurtosis
After installing minikube and kurtosis on our local machine, we edit our ~/.config/kurtosis/kurtosis-config.yaml
config-version: 2
should-send-metrics: true
kurtosis-clusters:
  docker:
    type: "docker"
  kube:
    type: "kubernetes"
    config:
      kubernetes-cluster-name: "minikube"
      storage-class: "standard"
      enclave-size-in-megabytes: 10
We can then prepare our devnet configuration in network_params.yaml:
participants:
  - el_type: reth
    cl_type: lighthouse
network_params:
  network_id: "1337"
additional_services:
  - blockscout
In a first shell:
kurtosis engine start
kurtosis gateway
In a second shell:
kurtosis run --enclave testnet github.com/ethpandaops/ethereum-package --args-file network_params.yaml
After a while we should have a fully featured Ethereum Devnet composed of:
el-1-reth-lighthouse: A Reth Execution Layer (EL) nodecl-1-lighthouse-reth: A Lighthouse Consensus Layer (CL) Beacon nodevc-1-lighthouse-reth: A Lighthouse Consensus Layer (CL) “Validator Client” node
To confirm that this network is producing blocks we look check:
kubectl logs el-1-reth-lighthouse
Or connect directly to the execution layer RPC:
In a first shell:
kubectl port-forward el-1-reth-lighthouse 8545
In a second shell:
curl http://localhost:8545 -X POST -H "Content-Type: application/json" --data '{"method":"eth_chainId","params":[],"id":1,"jsonrpc":"2.0"}'
curl -s -X POST -H "Content-Type: application/json" --data '{"jsonrpc":"2.0","method":"eth_blockNumber","params":[],"id": 1}' http://localhost:8545
The first curl command should return our Chain ID (1337) which confirms that we are running a custom network.
The second curl command should return the latest block number, this needs to be greater than 0x0 to show that we have produced blocks.
Extracting the devnet configuration
Run the following script to download files from the running pods to your local configuration directory.
mkdir -p configuration/validator-keys configuration/network-configs
kubectl cp vc-1-reth-lighthouse:/validator-keys configuration/validator-keys
kubectl cp cl-1-lighthouse-reth:/network-configs configuration/network-configs
Load configuration into the target cluster
Switch your kubectl to the target cluster and namespace, run the ./load-configuration.sh script and wait for its completion.
It should create, pre-populated network-configs and validator-keys volumes.
Deploy the testnet to the target cluster
(Option 1) Manually deploy with kubectl
Clone the repo: git clone https://github.com/PierreBesson/private-ethereum-testnet.git.
Install kustomize (you will need the latest version of the kustomize CLI not the one embedded in kubectl) and run:
kustomize build --enable-helm | kubectl apply -f -
(Option 2) Run using ArgoCD
- Install ArgoCD (Instructions from https://argo-cd.readthedocs.io/en/stable/getting_started/)
kubectl create namespace argocd
kubectl apply -n argocd -f https://raw.githubusercontent.com/argoproj/argo-cd/stable/manifests/install.yaml
- Once ArgoCD has finished installing, apply the ArgoCD Application resource to your cluster:
k apply -f argocd-app.yaml
- Get the ArgoCD admin password and open a port-forward on port 8080.
argocd admin initial-password -n argocd
kubectl port-forward svc/argocd-server -n argocd 8080:443
- Open the Argocd UI on [localhost:8080], you should see a
testnetapplication, click Sync.
Validate that your network is producing blocks
kubectl logs reth-bootnode-0

reth-bootnode-0 reth 2024-09-06T14:29:25.569793Z  INFO Status connected_peers=0 latest_block=0
reth-bootnode-0 reth 2024-09-06T14:29:50.570273Z  INFO Status connected_peers=0 latest_block=0
reth-bootnode-0 reth 2024-09-06T14:29:55.295498Z  INFO Block is already canonical, ignoring. block_hash=0x298e754155922a95e763752b634d8c04292c935bfce7c3fbc74d6e2b927a62ef
reth-bootnode-0 reth 2024-09-06T14:29:55.295605Z  INFO Forkchoice updated head_block_hash=0x298e754155922a95e763752b634d8c04292c935bfce7c3fbc74d6e2b927a62ef safe_block_hash=0x0000000000000000000000000000000000000000000000000000000000000000 finalized_block_hash=0x0000000000000000000000000000000000000000000000000000000000000000
reth-bootnode-0 reth 2024-09-06T14:29:55.295677Z  INFO New payload job created id=0x79b2dffd4603dfad parent=0x298e754155922a95e763752b634d8c04292c935bfce7c3fbc74d6e2b927a62ef
reth-bootnode-0 reth 2024-09-06T14:30:04.301041Z  INFO Block is already canonical, ignoring. block_hash=0x298e754155922a95e763752b634d8c04292c935bfce7c3fbc74d6e2b927a62ef
reth-bootnode-0 reth 2024-09-06T14:30:04.301167Z  INFO New payload job created id=0x35d335cf341c3b43 parent=0x298e754155922a95e763752b634d8c04292c935bfce7c3fbc74d6e2b927a62ef
reth-bootnode-0 reth 2024-09-06T14:30:04.761100Z  INFO Block added to canonical chain number=1 hash=0x9810053cc8ea4077bf8392234c4b3bc773181cdbaf67d635e3b0fcbf04f29200 peers=0 txs=0 gas=0.00 Kgas gas_throughput=0.00 Kgas/second full=0.0% base_fee=0.88gwei blobs=0 excess_blobs=0 elapsed=1.084258ms
reth-bootnode-0 reth 2024-09-06T14:30:04.765890Z  INFO Block added to canonical chain number=1 hash=0xabc29093b592460ce27391a3c6de48f5b717793cea95b348eab27dba4073c78d peers=0 txs=0 gas=0.00 Kgas gas_throughput=0.00 Kgas/second full=0.0% base_fee=0.88gwei blobs=0 excess_blobs=0 elapsed=997.606µs
reth-bootnode-0 reth 2024-09-06T14:30:04.791735Z  INFO Canonical chain committed number=1 hash=0x9810053cc8ea4077bf8392234c4b3bc773181cdbaf67d635e3b0fcbf04f29200 elapsed=24.867376ms
reth-bootnode-0 reth 2024-09-06T14:30:12.001092Z  INFO Block is already canonical, ignoring. block_hash=0x9810053cc8ea4077bf8392234c4b3bc773181cdbaf67d635e3b0fcbf04f29200
reth-bootnode-0 reth 2024-09-06T14:30:12.001274Z  INFO New payload job created id=0x84a83563a3d11275 parent=0x9810053cc8ea4077bf8392234c4b3bc773181cdbaf67d635e3b0fcbf04f29200
reth-bootnode-0 reth 2024-09-06T14:30:15.502108Z  INFO Block is already canonical, ignoring. block_hash=0x9810053cc8ea4077bf8392234c4b3bc773181cdbaf67d635e3b0fcbf04f29200
reth-bootnode-0 reth 2024-09-06T14:30:16.050036Z  INFO Block added to canonical chain number=2 hash=0xd7150618d06101e7cb411a8c21e1e1aa88574e4669cea27aaba6cb149b085715 peers=0 txs=0 gas=0.00 Kgas gas_throughput=0.00 Kgas/second full=0.0% base_fee=0.77gwei blobs=0 excess_blobs=0 elapsed=375.566µs
reth-bootnode-0 reth 2024-09-06T14:30:16.067500Z  INFO Canonical chain committed number=2 hash=0xd7150618d06101e7cb411a8c21e1e1aa88574e4669cea27aaba6cb149b085715 elapsed=14.25416ms
Deploy the monitoring agent to collect metrics and logs
Additionally, you can deploy Grafana Alloy to collect metrics and logs from your cluster.
A simple Alloy configuration (monitoring/config.alloy) is used to automatically scrape everything it can find and forward it to Prometheus and Loki.
To deploy the monitoring agent, save the following file to configuration/kustomization.yaml:
Note: you need to replace URLs/Usernames as appropriate and obtain passwords for the Prometheus and Loki endpoints.
In this example, I am using Grafana Cloud which offers free Logs and Metrics ingestion and visualization with some usage limits.
apiVersion: kustomize.config.k8s.io/v1beta1
kind: Kustomization

configMapGenerator:
- name: monitoring
  options:
    disableNameSuffixHash: true
  literals:
    - "LOKI_URL=https://logs-prod-012.grafana.net/loki/api/v1/push"
    - "LOKI_USERNAME=967777"
    - "PROM_URL=https://prometheus-prod-24-prod-eu-west-2.grafana.net/api/prom/push"
    - "PROM_USERNAME=1736103"

secretGenerator:
- name: credentials
  options:
    disableNameSuffixHash: true
  literals:
    - "prom_password=***"
    - "loki_password=***"
Apply the monitoring configuration to the same namespace with:
# Deploy config and creds secrets
kustomize build --enable-helm configuration/ | kubectl apply -f -
# Deploy alloy
kustomize build --enable-helm monitoring/ | kubectl apply -f -
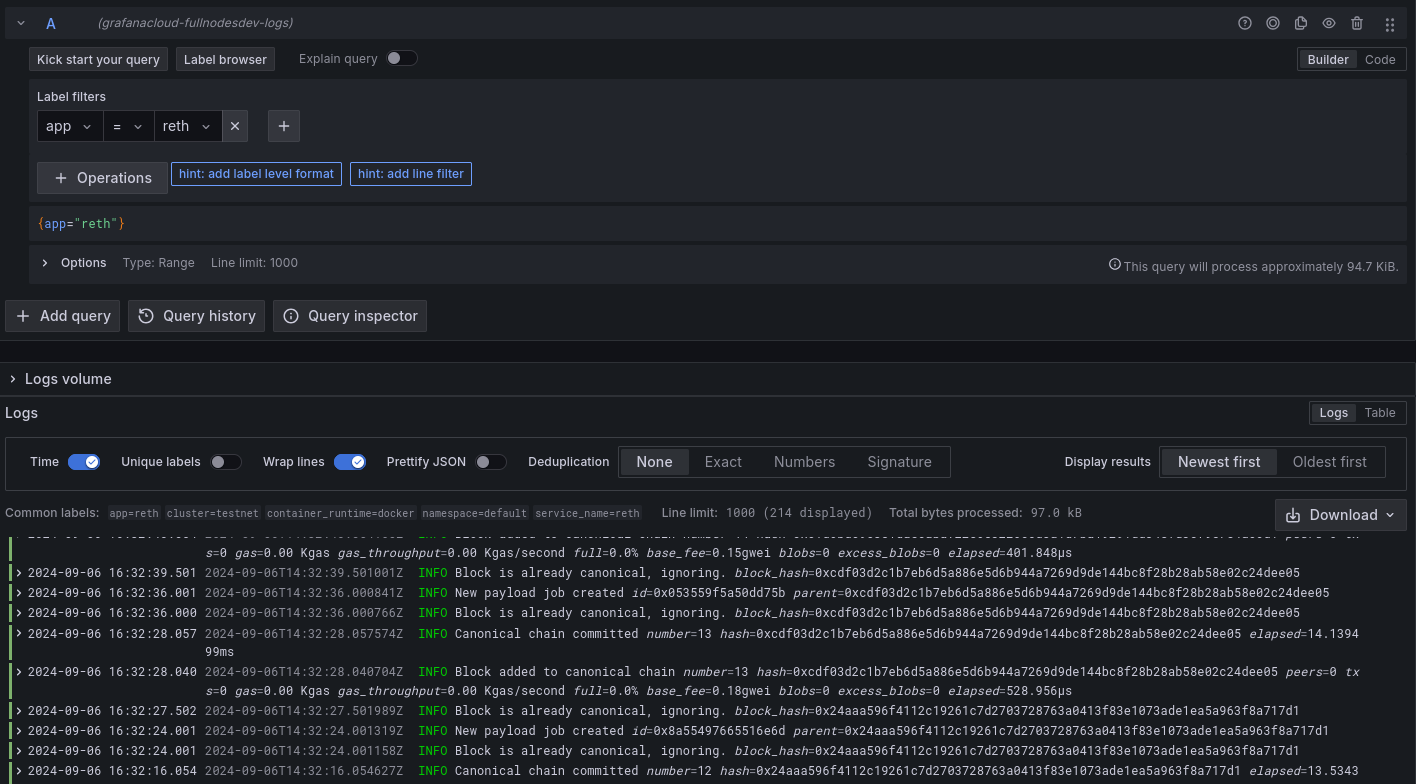
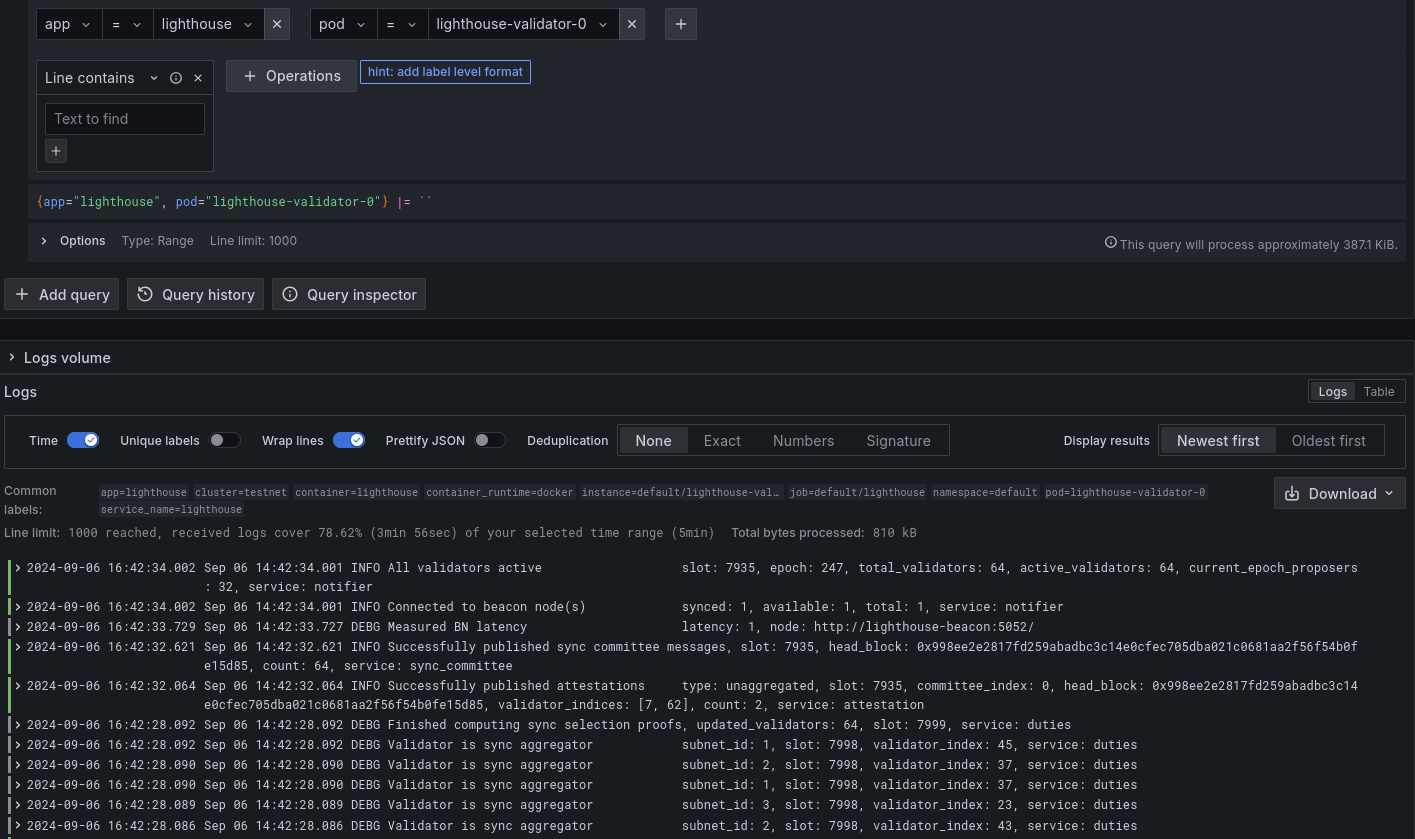
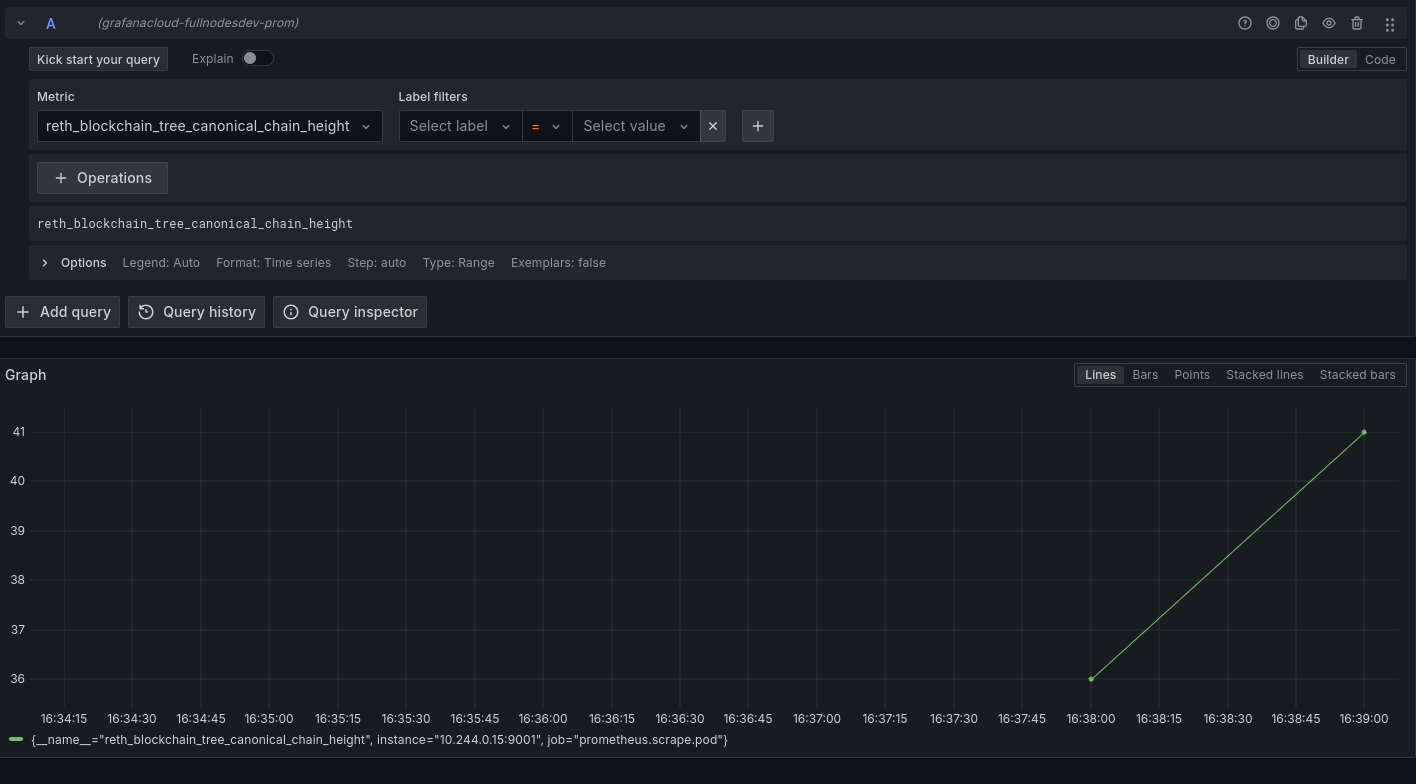
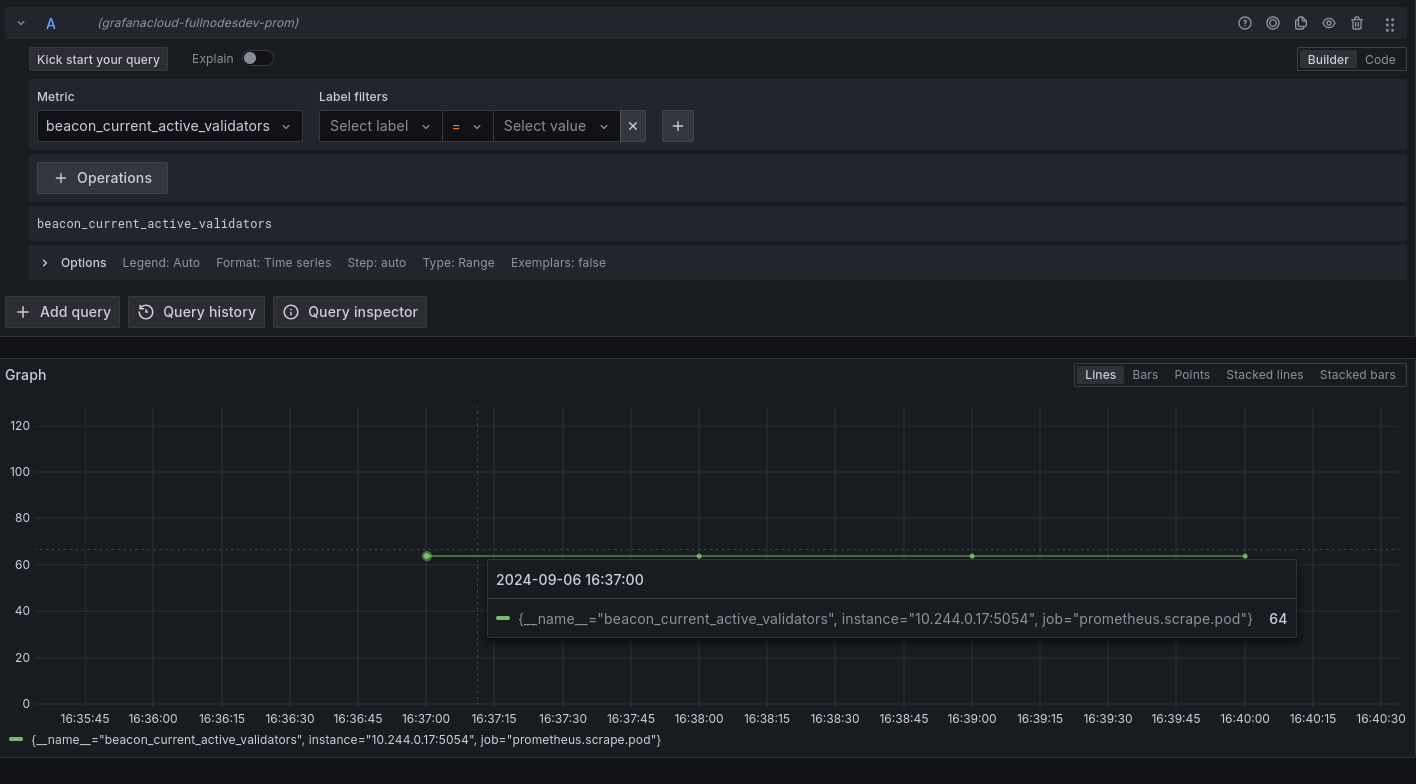
The Alloy agent should then start collecting and forwarding logs and metrics. We can see in Grafana that all our nodes logs and metrics are available.
A look at the monitoring data available on Grafana
Logs for Reth (EL), Lighhouse (Beacon) and Lighhouse (Validator)

![]()

Metrics for the EL and CL nodes
- Block height

- Currently active validator count

Going further
What could be added to improve the setup.
For node deployments:
- Add more nodes of each types to be more resilient.
- (If the goal is to expose the network publicly on the internet) Create NodePort services for blockchain nodes. The proper firewalls will need to be opened on the appropriate Kubernetes node ports.
For the monitoring:
- Create Grafana dashboards to observe the status of the reth, lighthouse beacon and lighthouse validator nodes.
- Improve the Alloy scraping config to be based on ServiceMonitors to collect only the metrics we need and reduce Grafana Cloud costs.
- Create basic alerts: volume full, block number not increasing, node down, etc.
Conclusion
Deploying a custom Ethereum testnet can seem like a very hard task due to complex beast that Ethereum has become following the Merge (separation of consensus and execution layers, validator staking, etc).
However, by leveraging the great Kurtosis automations from the EF DevOps team, we can extract customized working configurations for any available clients and reuse it in our own infrastructure with the required adaptations to manage a persistent long-running testnets.